First Time User Guide For
Wilson Engagement Platform

Thank you for signing up with Wilson!

Let’s jump right into getting your Engagement tool set up. Here we will cover setting up your branding so Wilson matches your company, Defining your Objective, The different Page Types and what they do, building your conversation in the editor, and Installing the Wilson widget on your website!

Step 1: Display Your Brand Assets


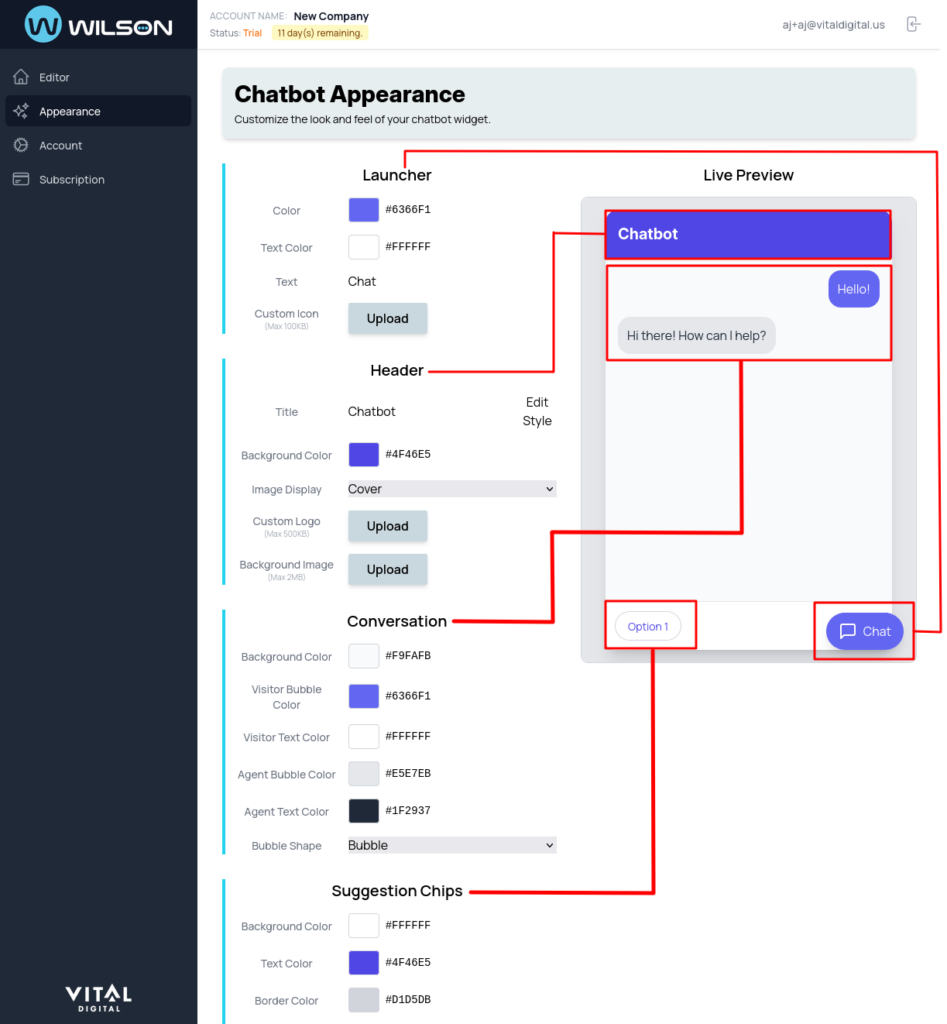
  • Start by heading to the Appearance tab. Here you can alter the appearance of the Launcher, Header, Conversation, and Suggestion Chips. Any changes made can be referenced in the Live Preview at the right side of the page.

1.1 Launcher Section

Let’s customize your Launcher.  This is the widget that displays on your website in the bottom right corner when the conversation is minimized.

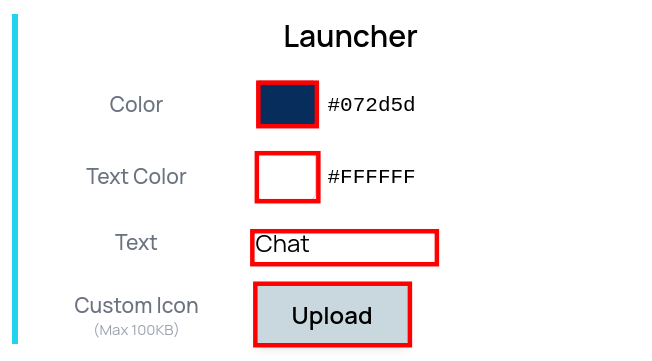
To change the display text, simply alter the field next to Text.

To change the color of the Widget itself, click on the field next to Color. Here you can either type in a color code if you have it, or pick one from the selector. This is the same process to change the Text Color.

Click Upload to add a Custom Icon. Custom Icons are recommended to be 150×150 pixels and have transparent backgrounds.

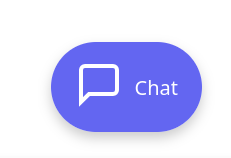
Default Launcher Icon
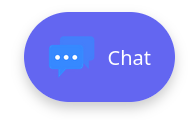
Custom Launcher Icon
Launcher Editor

1.2 Header Section

The Header lives at the top of your Conversation.

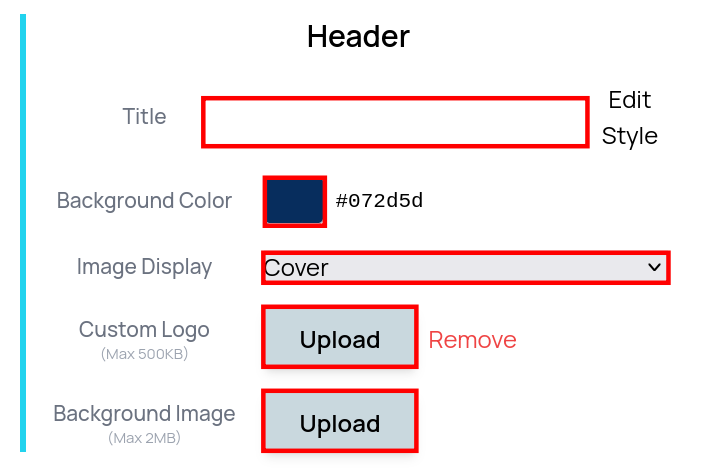
To Change the name of your tool, alter the text in the field next to Title.

Background Color displays behind your title. Change this color by altering the field next to it. You can enter a hex code or utilize the color picker. 

Custom Logo displays your companies logo in the header. The image size must be under 500 KB.

Background Image controls the image at the top of your widget. Upload your own or set your Custom Logo to fill the header.

Step 2: Define The objective of your flow

What’s your bot’s goal?

Your goal shapes everything — the pages Wilson lives on, and how conversations flow.

Lead Generation — Guide visitors toward an action: submitting contact info, booking a demo, or visiting a storefront.

Site Concierge — Resolve issues at the highest level possible. Typically lives on informational/internal pages to avoid deterring new visitors.

Combination — Handles both, with flows tailored to where the visitor is in their journey.

Choose your goal first — it determines your page placement and conversation design.

Mapping out your flow structure

We recommend mapping out your flow structure before creating it in Wilson. Writing out the flow of the conversation helps you to make sure you accomplish the objective, and gives you material to reference when working inside Wilson Engage. Once your flow is mapped, utilize the Flow Editor to create the conversation on Wilson Engage. 
Step 3: Learn about Page Types

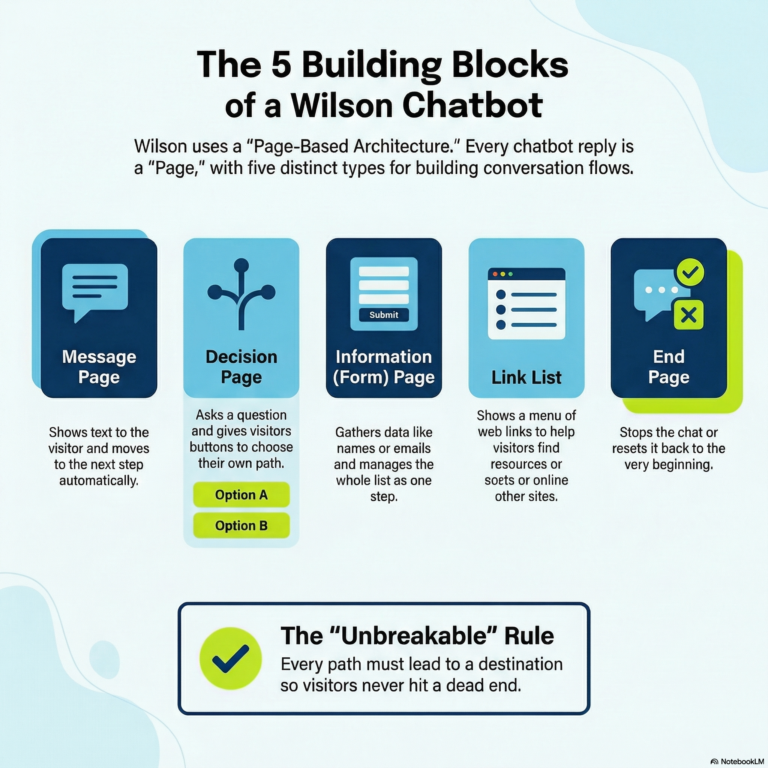
Let’s dive into the 5 different page types Wilson has, and what they do!

These are the page types Wilson supports. The types are Message, Link, Decision, Information and End Page

3.1 Message Page

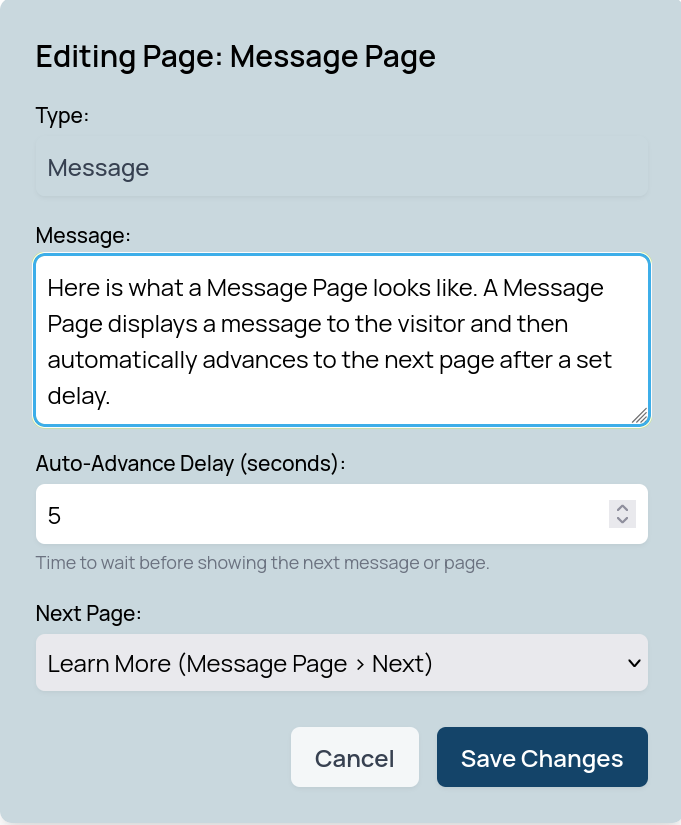
Editor View
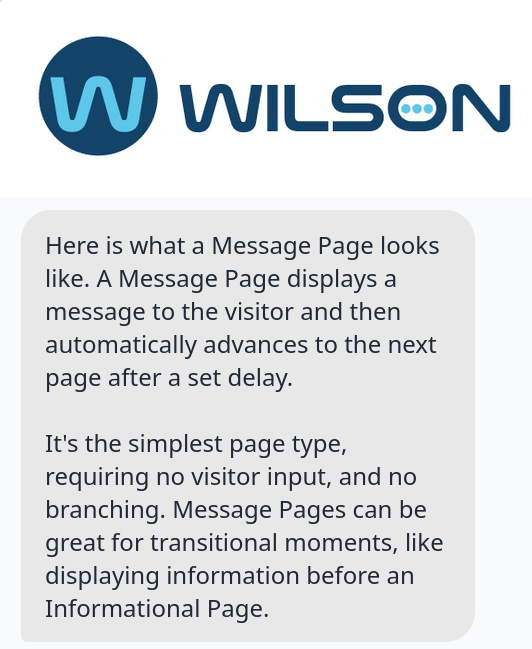
Live Result

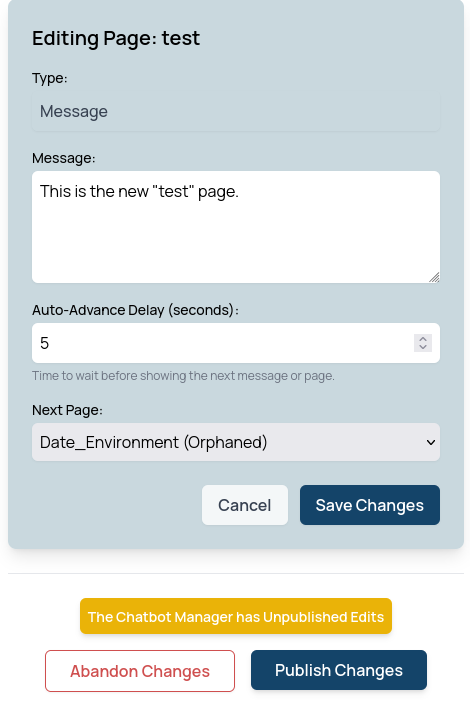
A Message Page is simple. It allows you to present a message, and then after a set amount of time it moves onto the next page.

3.2 Decision Page

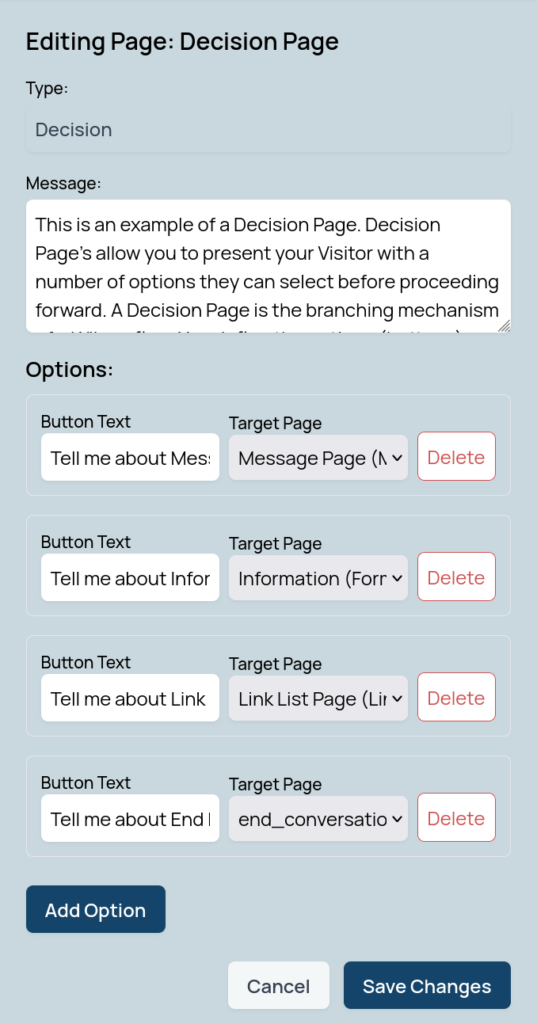
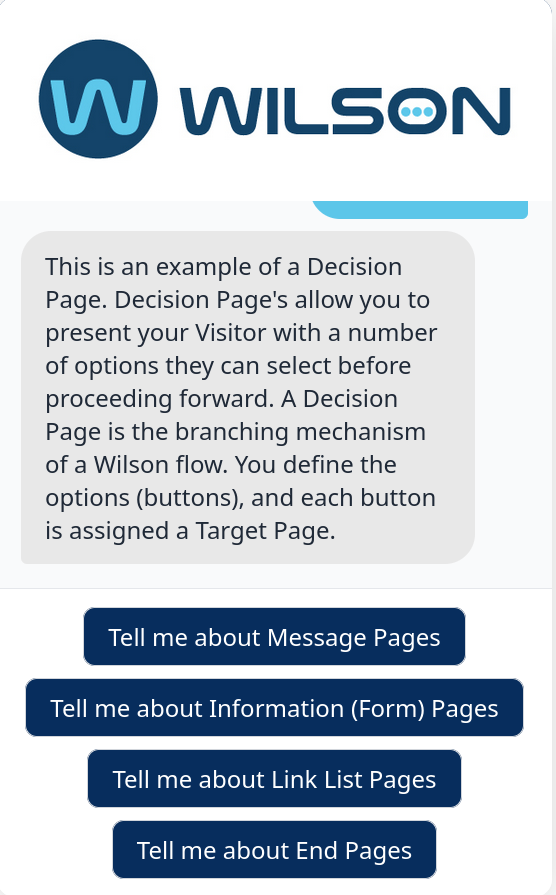
Decision Pages allow the user to select the next flow from a set number of options you provide them. 

Editor View
Live Result

3.3 Information (Form) Page

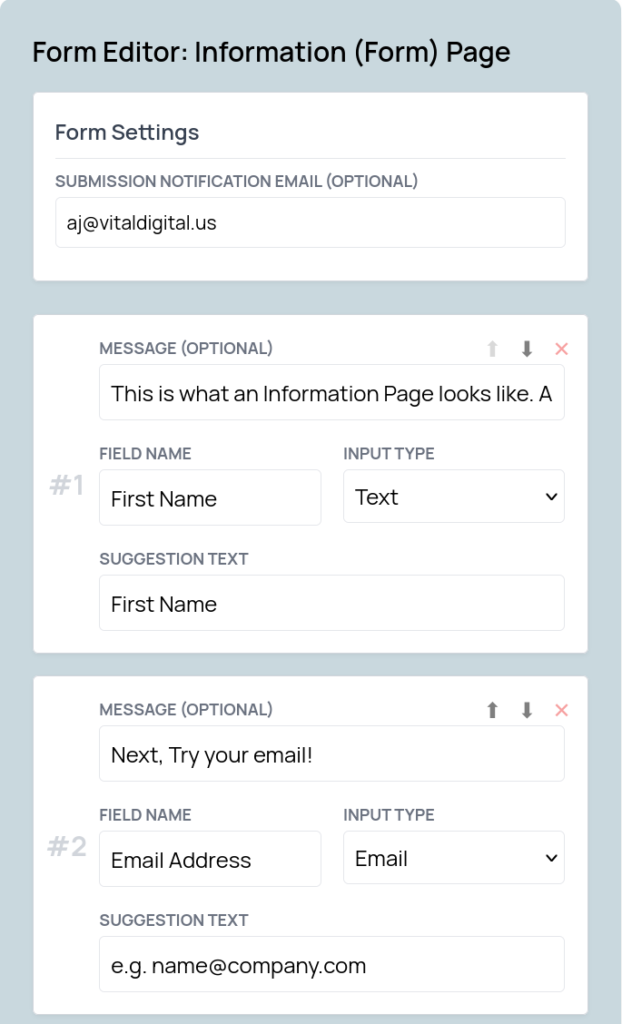
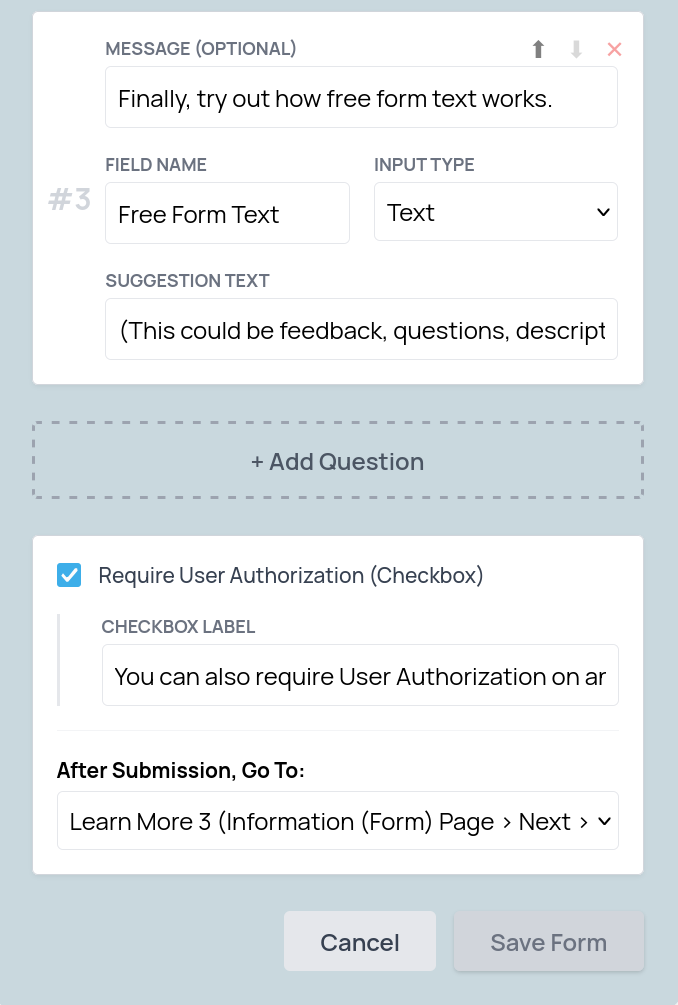
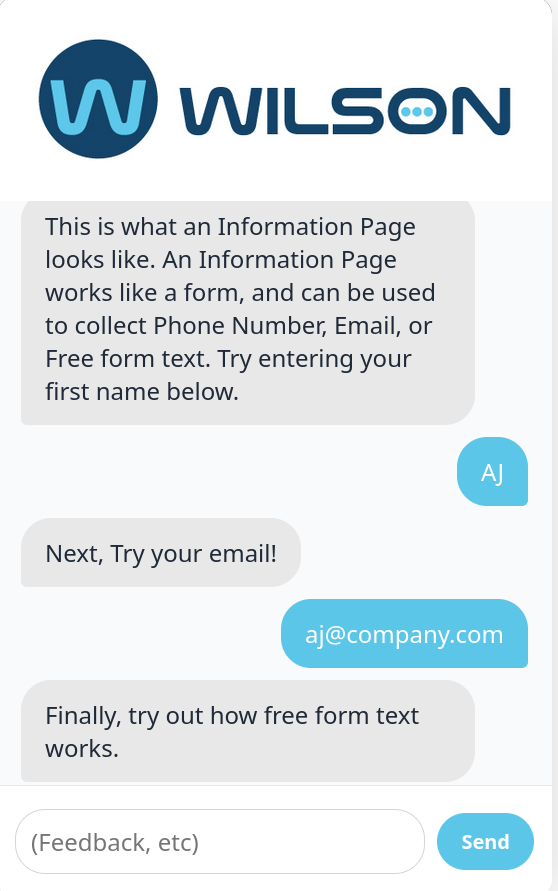
Information pages collect data like a form. On an information page you can collect contact information, or free form text. 

Editor View
Editor View
Live Result

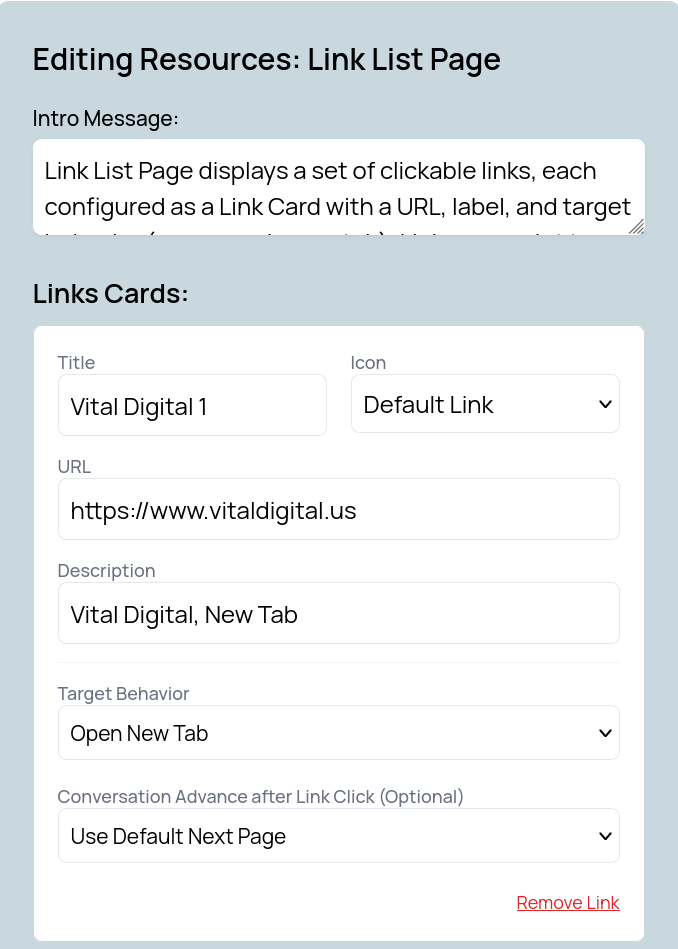
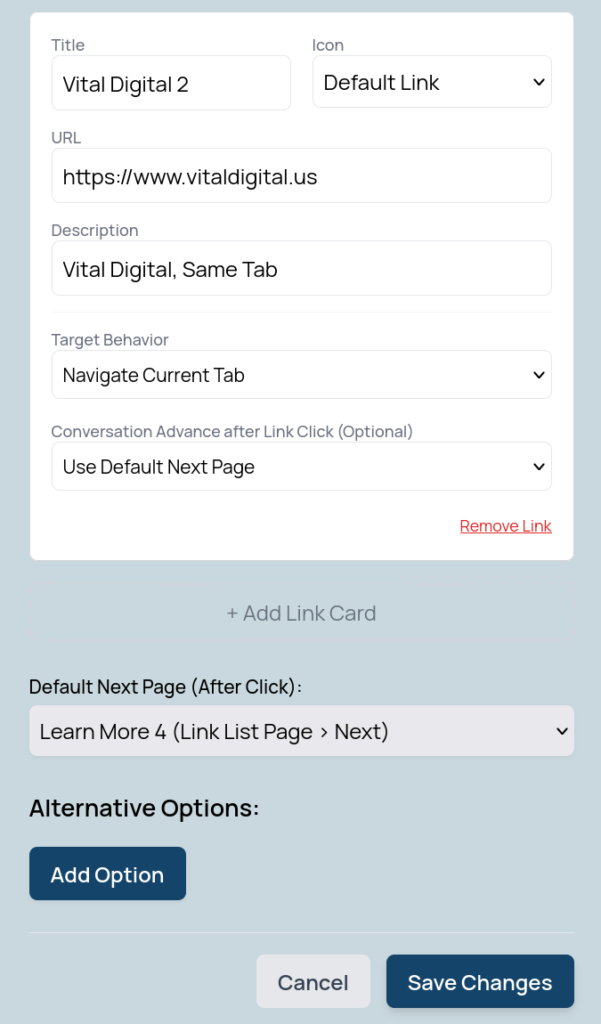
3.4 Link List

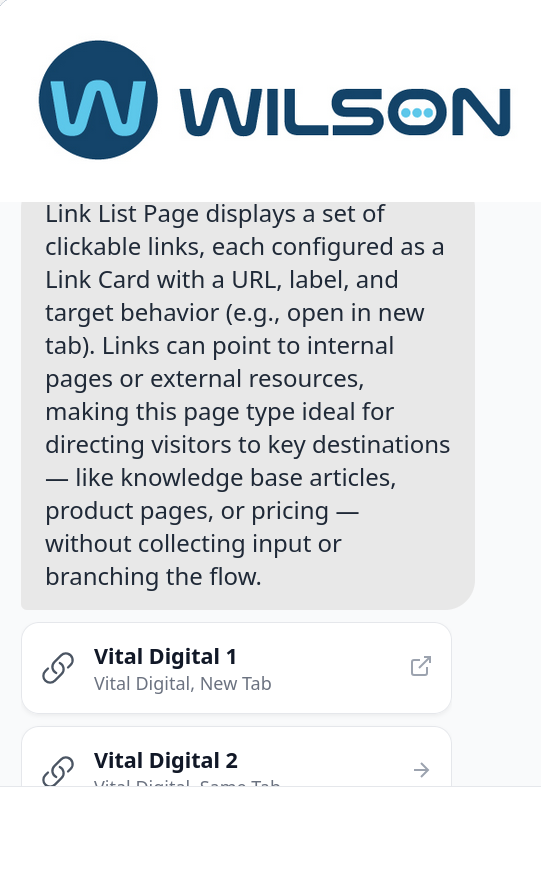
A Link List allows you to provide a set number of resources that redirect the Visitor. This can be used to redirect them to different places on your site, or to external resources. 

Editor View
Editor View
Live Result

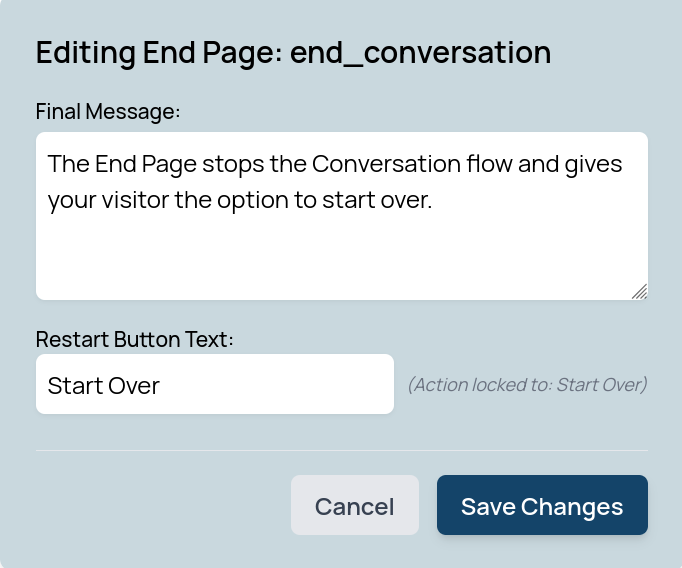
3.5 End Page

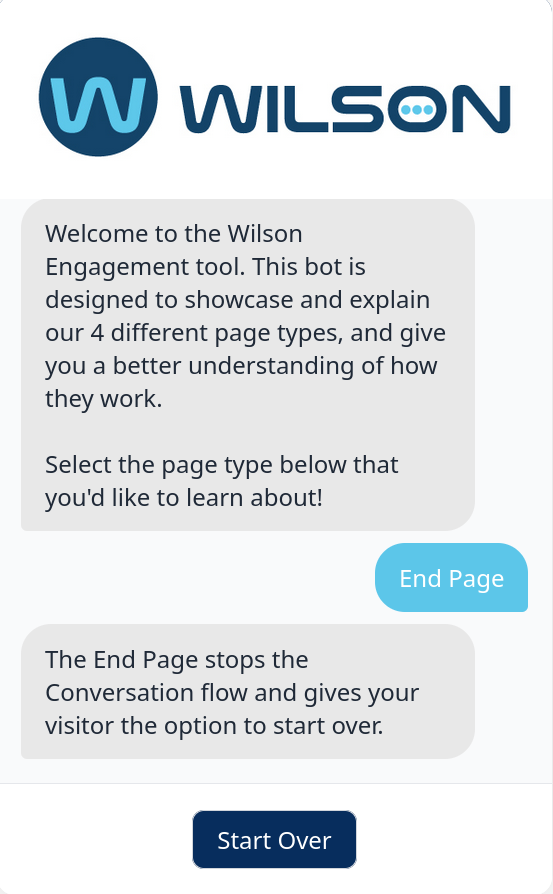
The End Page stops the Conversation flow and displays a message. It then gives the visitor the opportunity to start the flow from the beginning. 

Editor View
Live Result

Step 4: Build Your Flow

Let’s get into building your conversation flow!

There are two ways you can build out your flow in Wilson – manually or with our Conversation Generator. 

Something to keep in mind – Wilson’s editor is designed with a safety-first philosophy: You cannot break the conversation.

To ensure your visitors never hit a “dead end” or a broken link, the editor enforces specific rules for creating and linking pages.

4.1 Conversation Generator

Wilson’s Conversation Generator crawls your website and builds a flow automatically. Here’s how to use it:

Click the blue AI Generator button on the right side of the Conversation Generator.


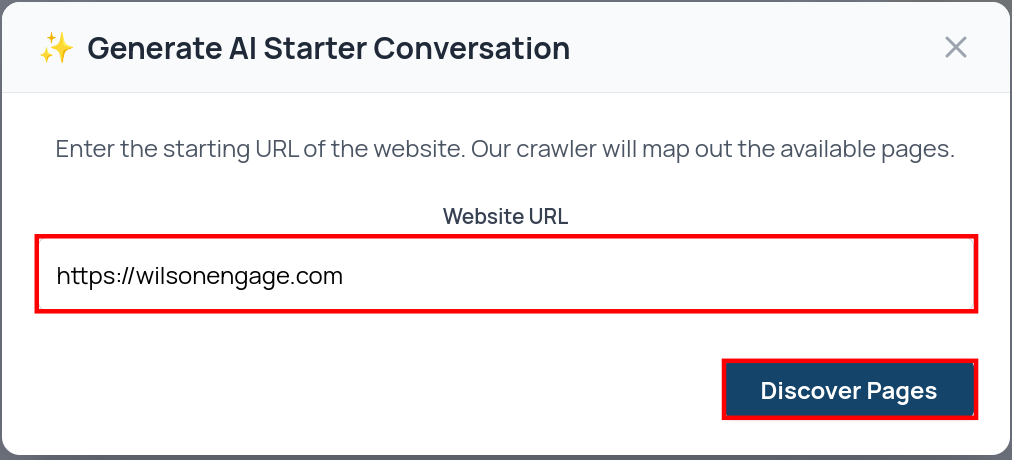
Paste in the URL you want to crawl (make sure to include https://). Hit Discover Pages and Wilson will map out your sitemap. 

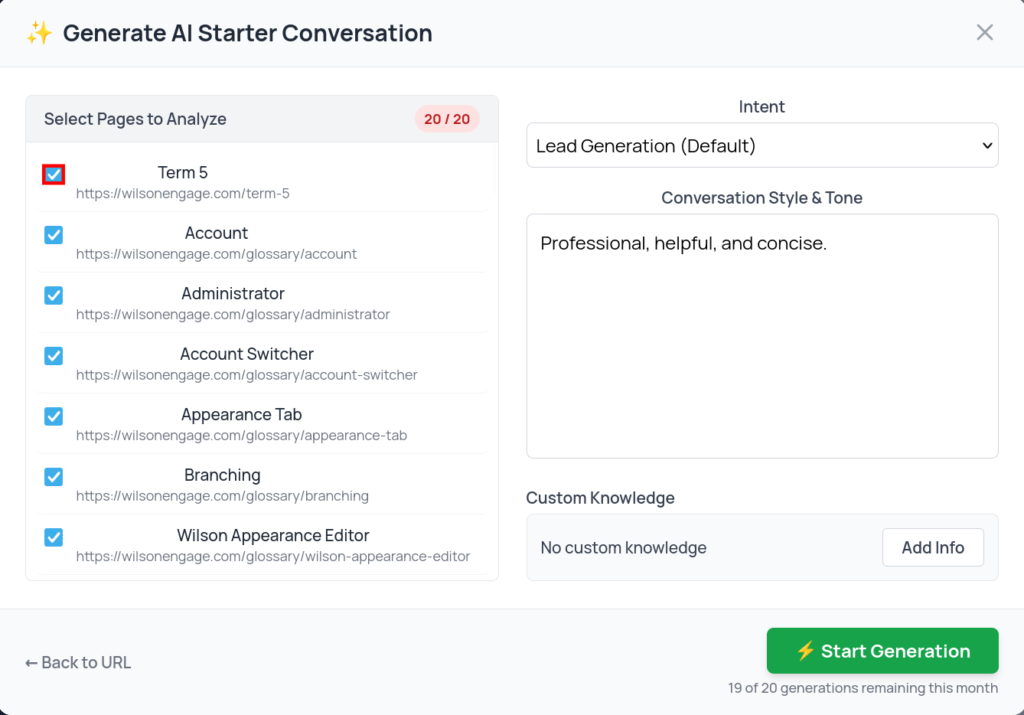
Check the boxes for the pages you want included and uncheck the ones you don’t.

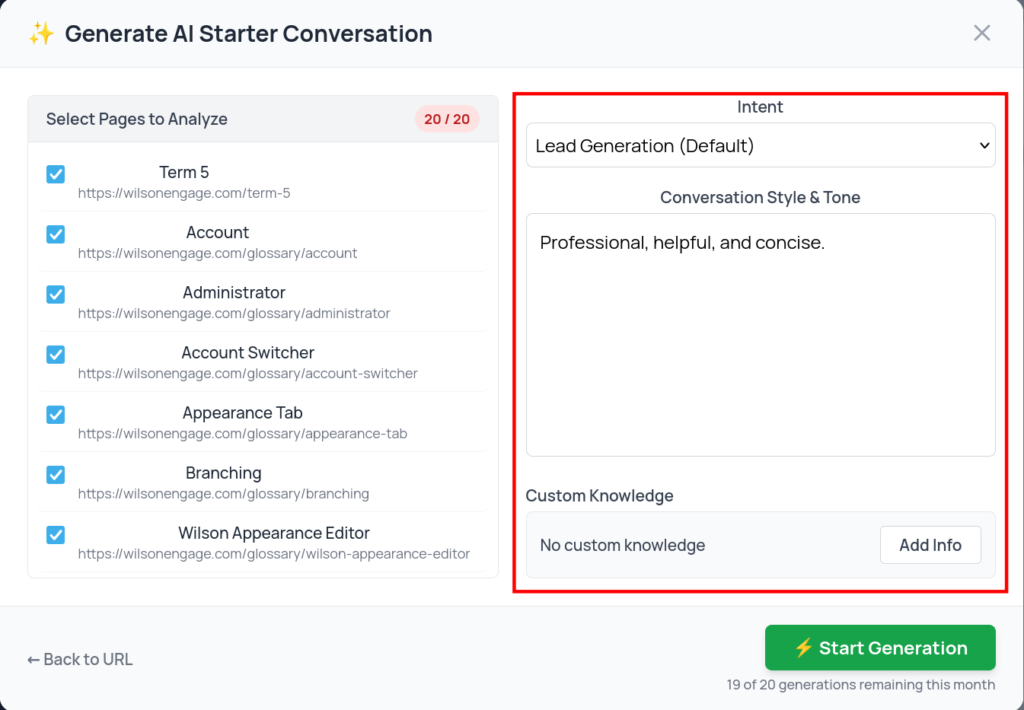
 Next, set your Intent — Lead Generation is the default, or you can choose Site Concierge for a more navigational, guide-style flow. Under Conversation, Style, & Tone, describe how you want Wilson to sound (professional, friendly, concise, etc.). The Custom Knowledge field is for anything Wilson can’t pick up from your site on its own.

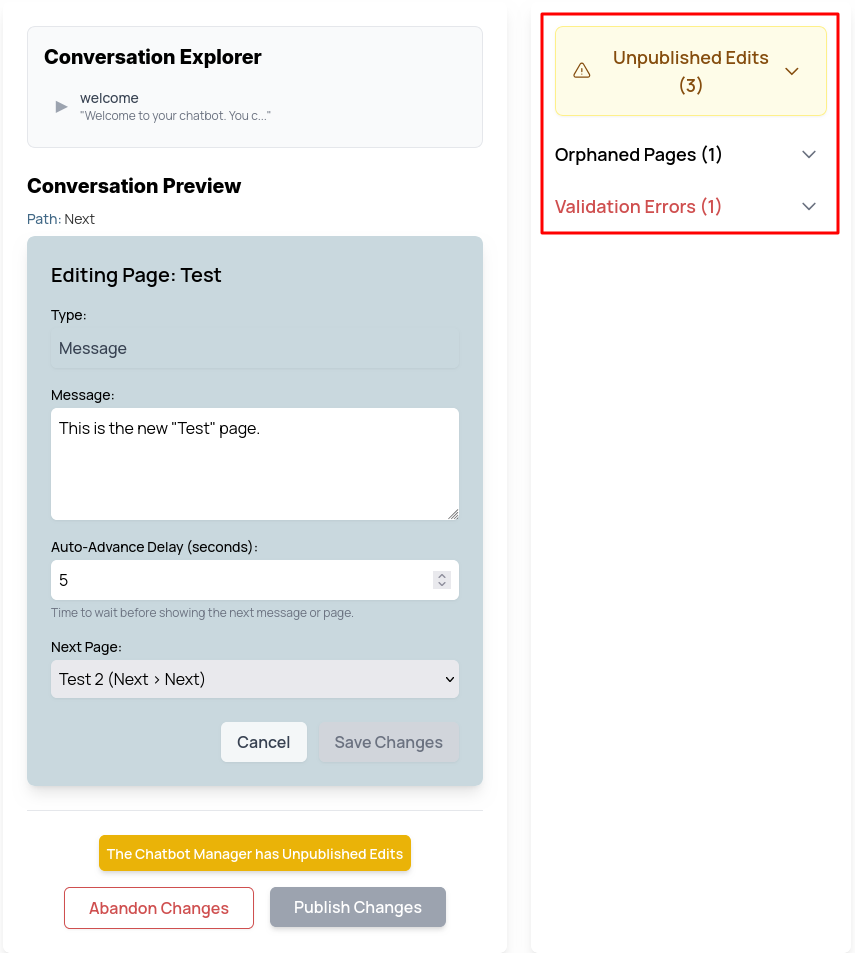
Click the green Start Generation button. After this you can review the flow and tweak anything that needs adjusting. The Conversation Explorer is great for navigating your flow easily. Just click on a tab!

Orphaned Pages are valid pages in your account that aren’t currently linked to your conversation flow. Visitors won’t see them — they’re just sitting safely in your account until you’re ready to reconnect or delete them. Validation Errors – A Validation Error is when a Page is missing a “Next” destination. Simply link it to a page to resolve this. 

4.2 Manually Create Conversation 

Now we’ll go over Manually Creating your conversation. 

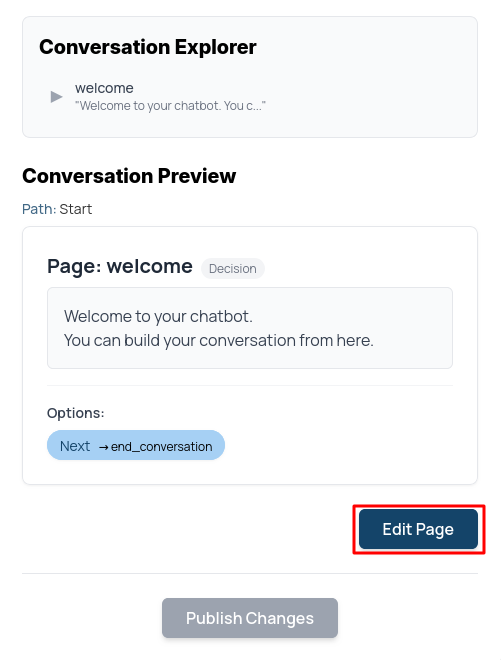
Click the blue Edit Page button to get started!

Branching to Build:The way to add new content is to branch from an existing page.  

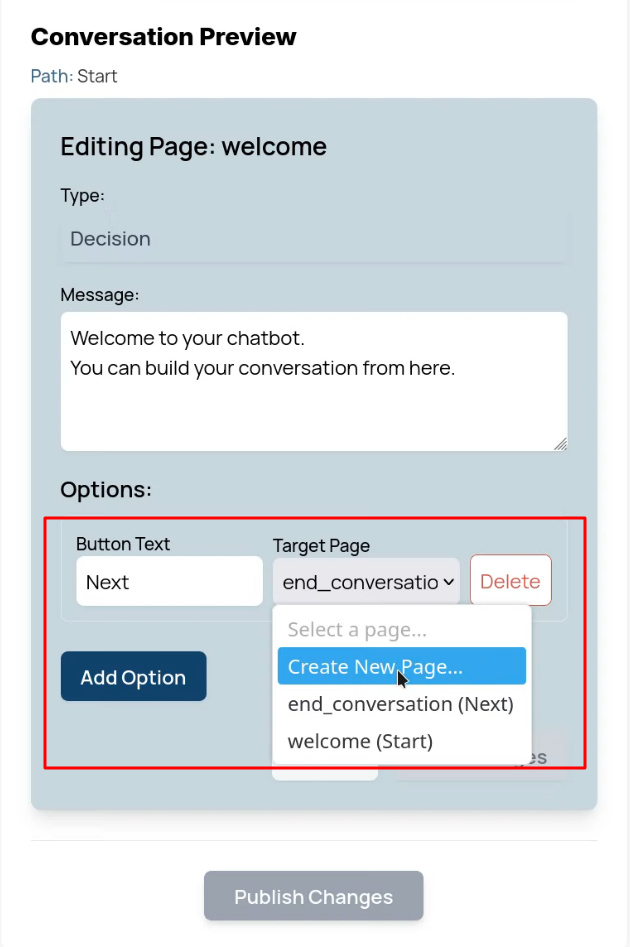
To do this you’ll create a button. Buttons can be found under the Options section. If a button isn’t present, or you want multiple, click Add Option.

Name your button in the Button Text field. Next, you’ll assign a Target Page (the page you want your button to open).

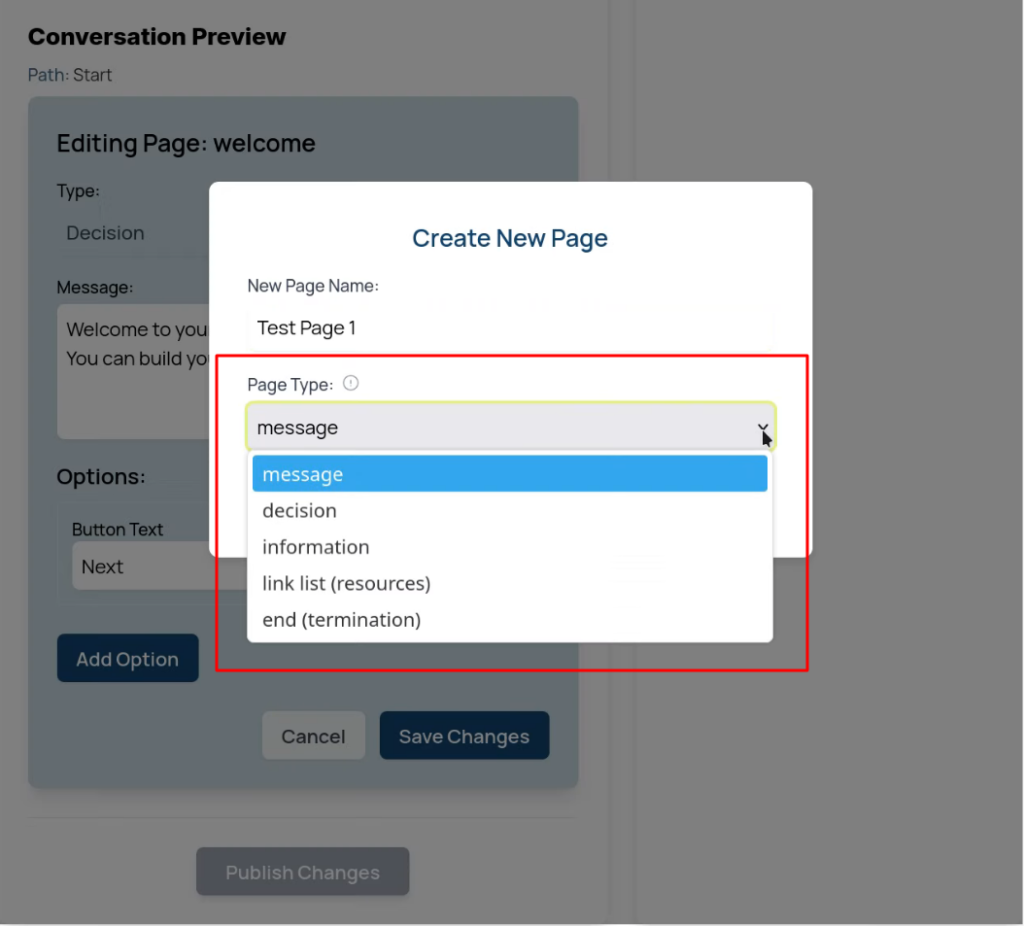
Open the Target Page drop down and select Create New Page at the top of the list.

Give your new page a name, then choose a Page Type from the dropdown:

  • Message – Displays a message and moves on automatically
  • Decision – Lets the visitor choose from multiple options
  • Information – Collects data, like a form
  • Link List – Shows links to redirect visitors to resources

You can save any changes you’ve made to the editor, without making the change live, by clicking Save Changes.

To apply these changes so that they are live, click Publish Changes

Step 5: Install Wilson Engagement Platform

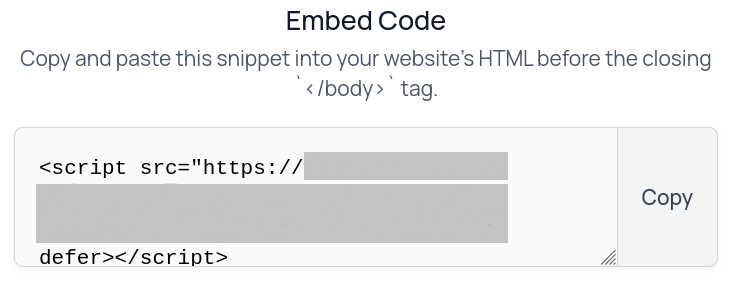
Installing Wilson Engagement on your website is a straightforward process. Select the Appearance tab on the Navigational Sidebar. This will open the Appearance Editor. Scroll to the bottom of this page, here you will find a section called Embed Code.

Copy and paste the code snippet into your website’s HTML before the closing </body> tag. 

Once you have your embed code in place and saved, try running through your iteration of Wilson from the customers perspective! This is the best test for seeing how the conversation flows. 

Congrats

Congratulations! You have successfully completed the Wilson Quick Start Guide.